Creating your first power-up
Now that we're set up with VS Code, let's get to writing some actual code!
What is a power-up
In Fiero, a Power-Up is essentially a data structure (called a struct) that enhances your game objects (or layers) with configurable settings. You add these power-ups to layers in the editor, allowing you to tweak their properties visually.
Here's what makes a Power-Up special, compared to a plain struct:
- It uses the
@PowerUpattribute. - All its fields must have default values.
- Each field becomes editable through the editor's UI.
Now, let's create a simple power-up for player movement controls.
Defining a power-up
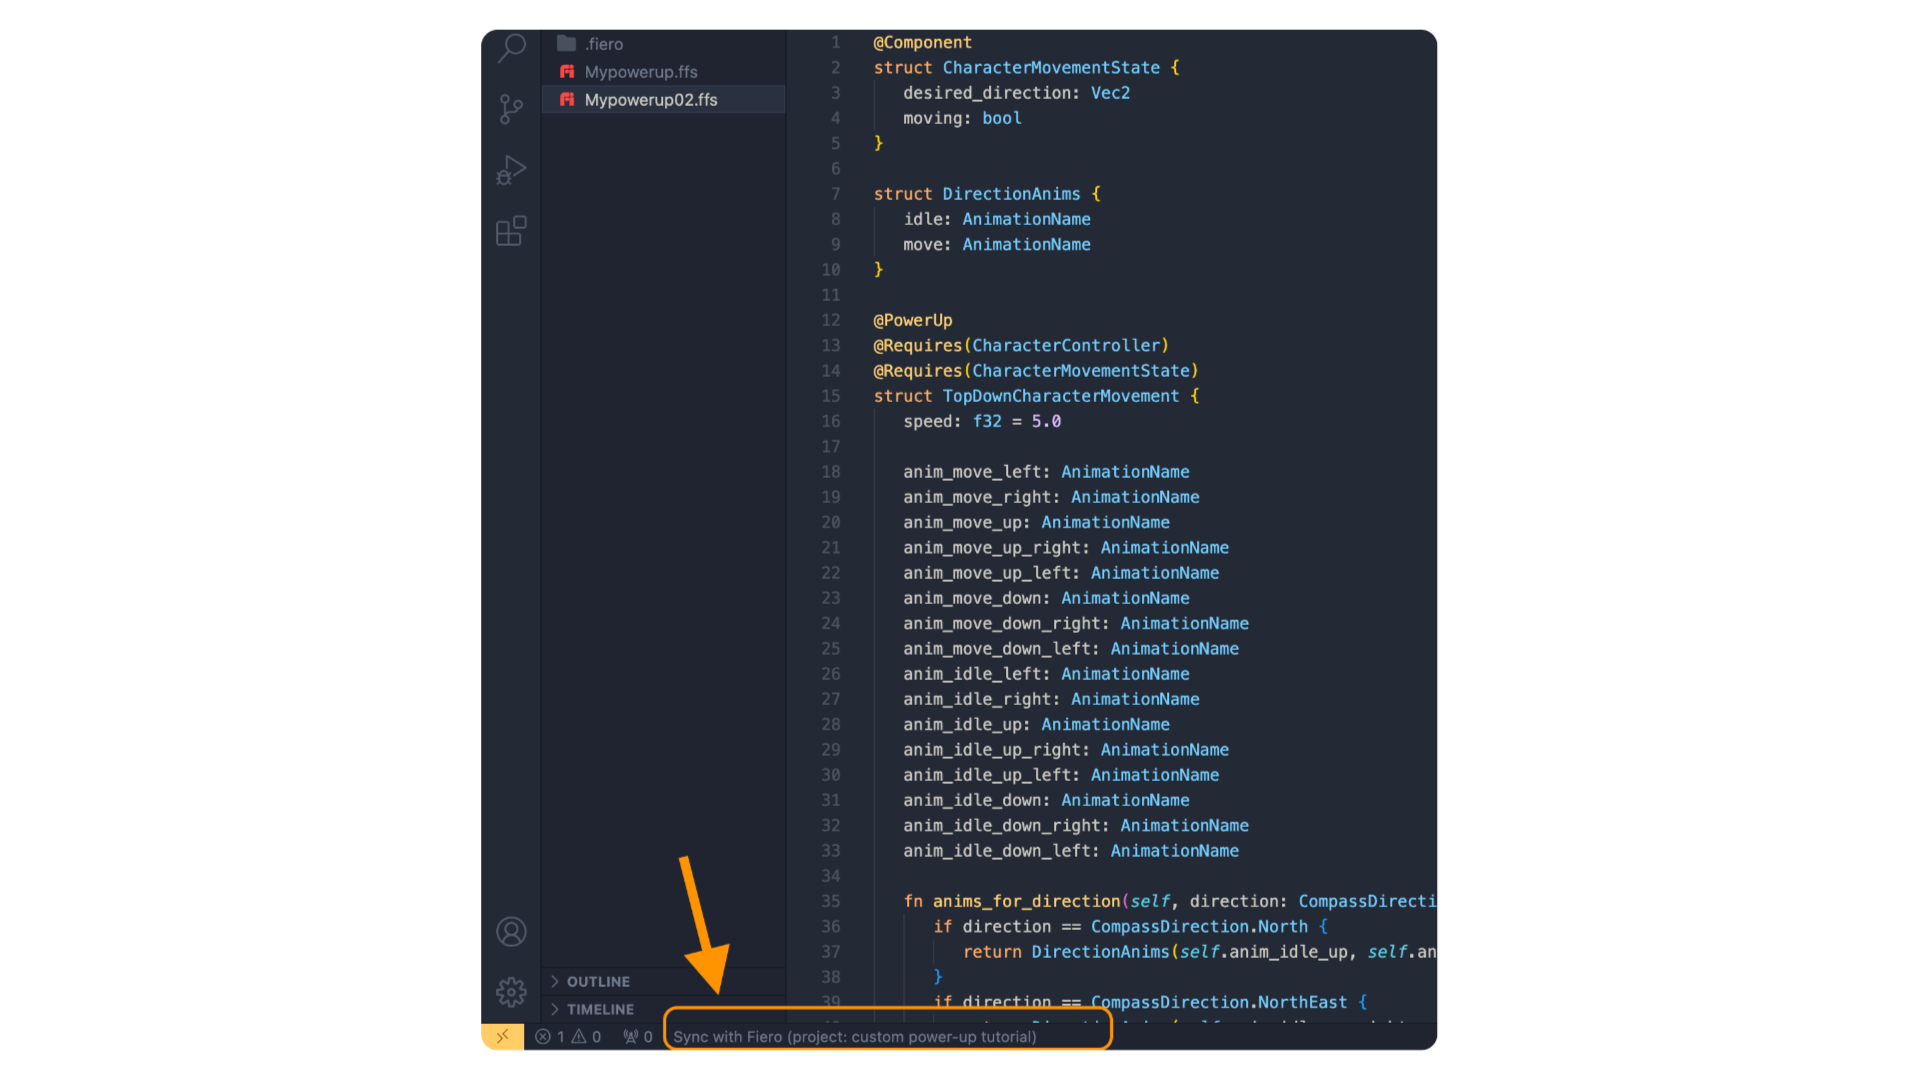
Start by defining your power-up like this:
@PowerUp
struct TopDownPlayerControls {
	move_left: Key = Key.A
	move_right: Key = Key.D
	move_up: Key = Key.W
	move_down: Key = Key.S
}
What's happening here?
@PowerUptells Fiero that this struct is a power-up.move_left,move_right,move_up, andmove_downdefine the keybinds for player movement. Each field has a default value (e.g.,Key.Afor moving left).
When you attach this power-up to a layer in your scene, the editor will automatically generate a UI for configuring these fields. It will look something like this:
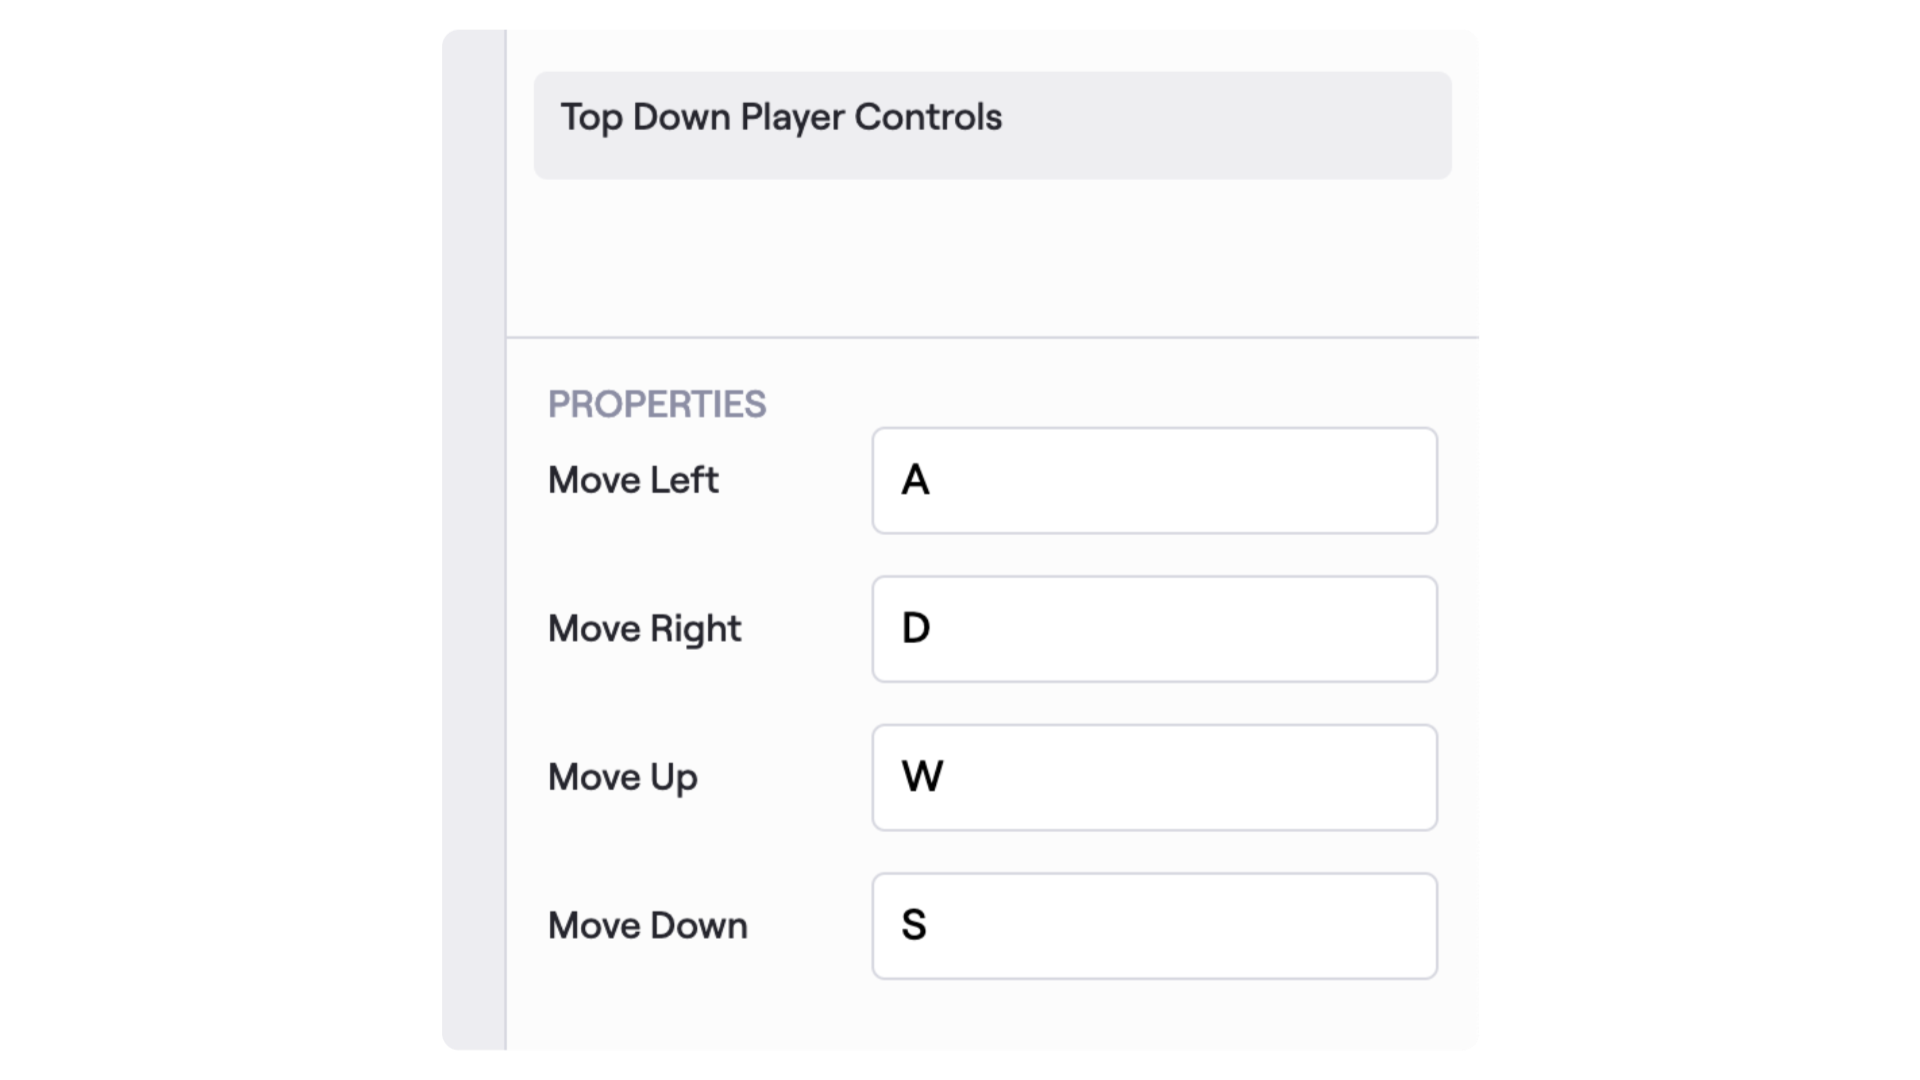
This makes it easy to adjust keybinds without modifying your code!
Adding behaviour with a task
Power-ups are just data on their own, so to make them functional, you need to define a task. A task is a function that uses power-ups and other engine data to define game logic, like movement.
Tasks run automatically for each layer that uses the associated power-ups. Let's write a task to make the player move based on the TopDownPlayerControls power-up.
Defining a movement task
Here's how to implement a task for player movement:
@Task
fn update_player_movement(
	controls: &TopDownPlayerControls,
	transform: &Transform,
	input: &InputState,
	step: &Timestep,
) {
	// for top-down movement, we're going to need two input axes, vertical and horizontal
	// then we normalise that vector so that moving diagonally isn't extra-fast
	let direction = Vec2(
		x = input.position_axis(controls.move_left, controls.move_right),
		y = input.position_axis(controls.move_down, controls.move_up),
	).normalise_or_zero()

	// we want our character to move at 5 metres per second, regardless of framerate
	// multiplying the velocity by the timestep achieves this
	let velocity = direction * 5.0
	transform.position += velocity * step.as_seconds()
}
Let's analyse those parameters a little:
controls:TopDownPlayerControls- This is the power-up we just created. It provides the movement keybinds.transform: Transform - This built-in power-up tracks the layer's position in the scene.input: InputState - This engine interface checks the state of key inputs (e.g., whether a key is pressed).step: Timestep - An engine interface for tracking how long a step or frame is, so we can make all our code framerate-agnostic.
How it works
-
Calculate the direction vector: Combine the key inputs into a 2D vector (
Vec2) that represents movement direction. For example:- Pressing
WandDsimultaneously results in a diagonal movement vector, going up and to the right. - The
normalise_or_zero()ensures that diagonal movement doesn't become faster than horizontal or vertical movement.
- Pressing
-
Apply velocity: Multiply the direction by a movement speed of
5.0metres per second. -
Make it framerate-independent: Scale the velocity by
step.as_seconds()to ensure consistent movement across different framerates - running at 60 FPS shouldn't make the character faster than 30 FPS, for example. -
Update the position: Add the calculated velocity to the layer's position using
transform.position.
Testing in the editor
Now that we've created a power-up and task, let's test it!
-
Run the Fiero: Sync command to update your changes.
-
Open the editor, and from the Power-up panel, select "My Power-Ups" from the drop-down menu. Attach the
TopDownPlayerControlspower-up to a layer.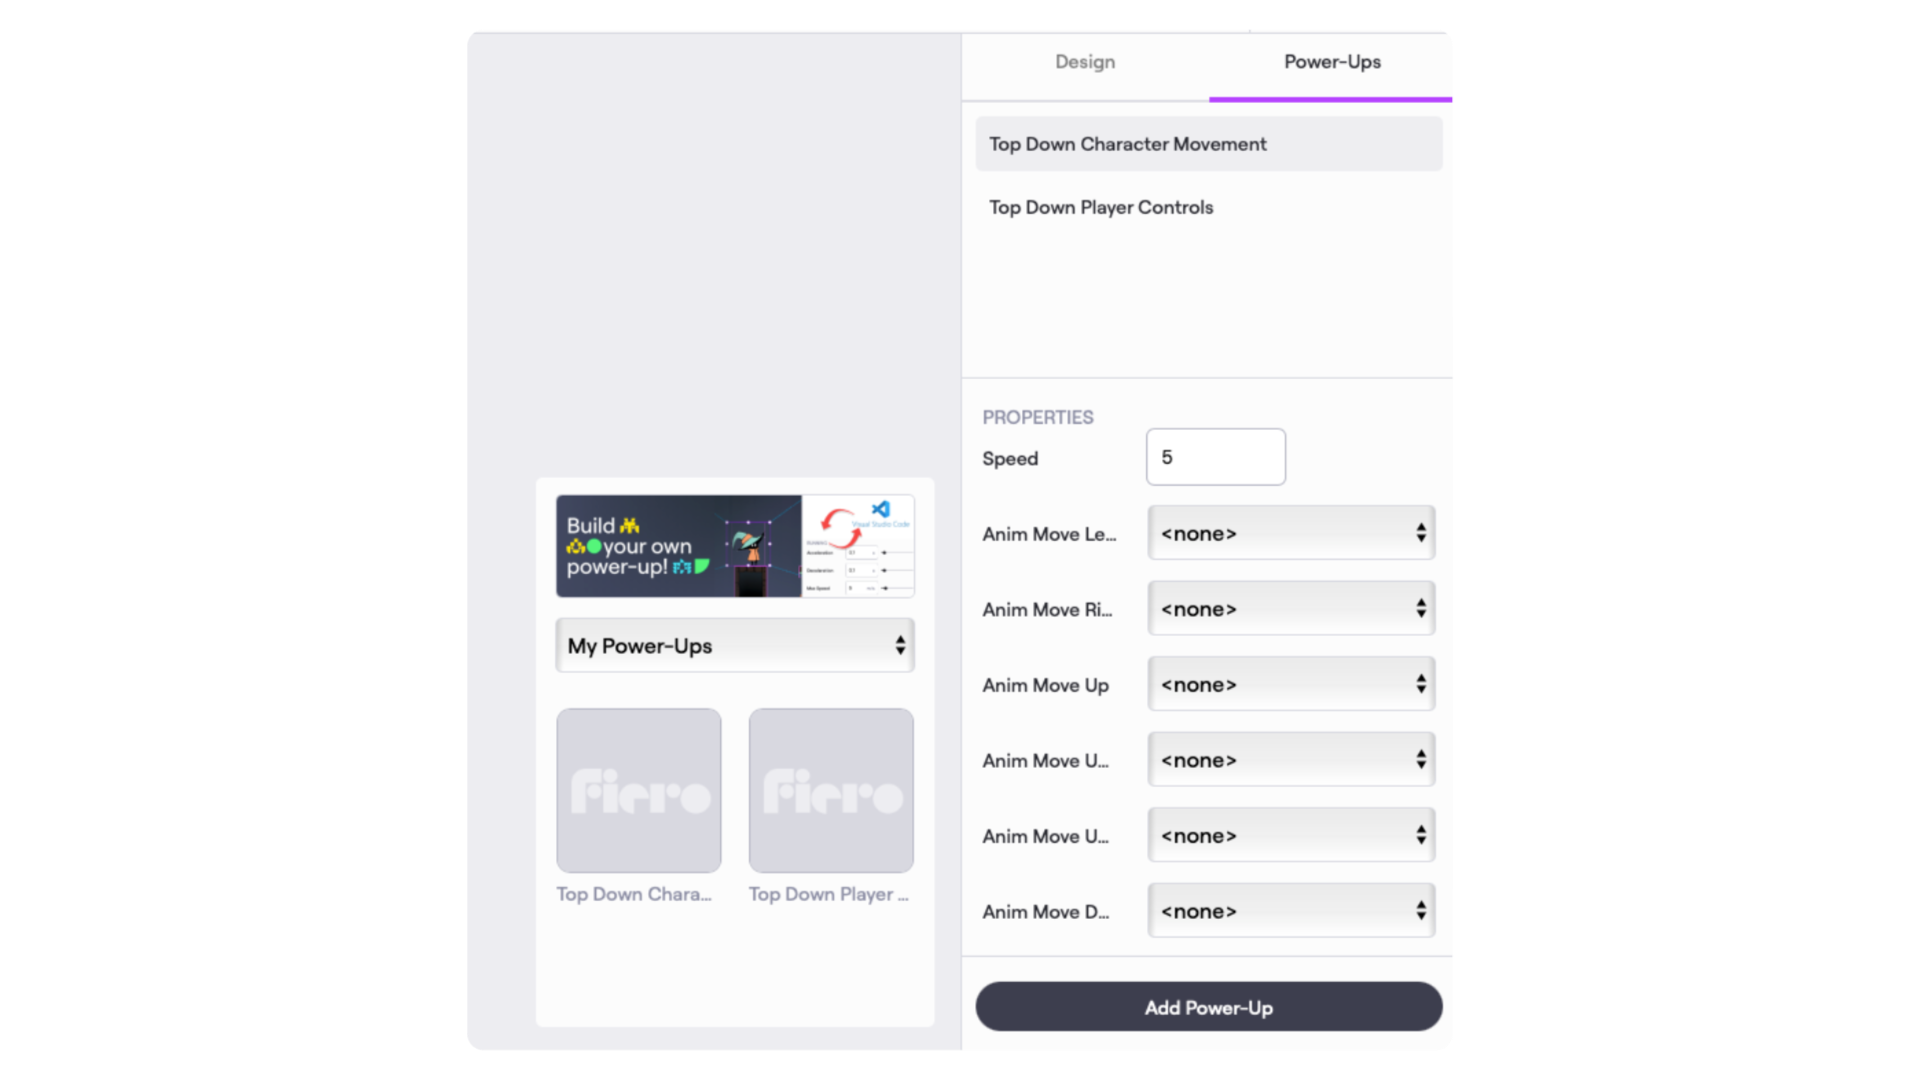
-
Press Play and test your creation.
Tips
Try tweaking the movement speed (e.g., change 5.0 to 10.0) in the task code. Sync the project again and see how the changes affect the game. This instant feedback loop makes Fiero incredibly powerful for prototyping.
Conclusion
Congratulations! You've just created your first power-up and linked it to game behaviour using a task. This simple setup allows for powerful customization and interactivity in your game. Experiment with different behaviours to see how you can expand on this idea!